How do I setup web filtering on managed Chromebooks
This article describes how to protect Chromebooks in your school or organization using Mobicip's web filter.
NOTE: It is assumed that you have access to the Chromebook Management Console in your Google domain and that the Chromebooks you wish to protect are enrolled in it.
Enterprise Account Setup
Create a Mobicip Enterprise account. This account is distinct from a Mobicip family or consumer account. Let us know the email address that you used for the setup, so we can add the licenses to your account.
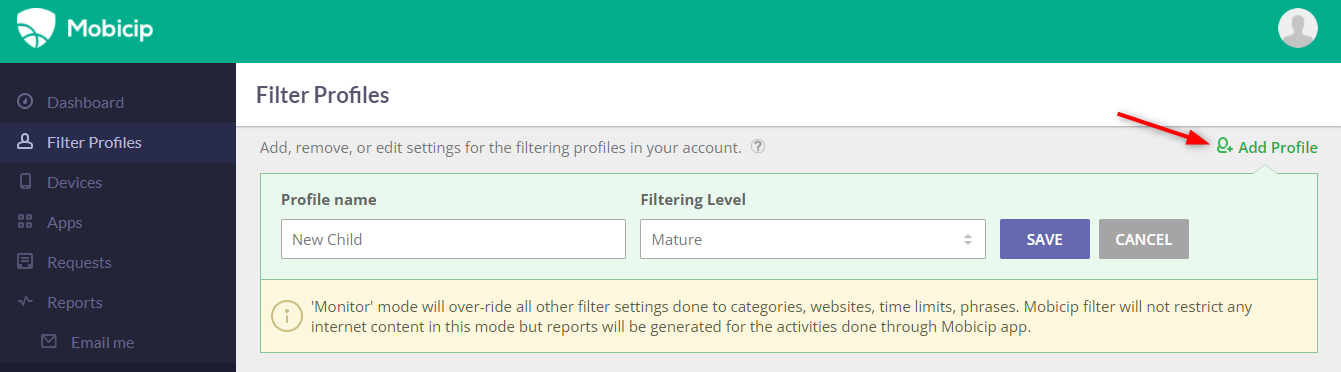
Once licenses are setup and confirmation email is received, login to your Mobicip account and select Filter Profiles from the menu. Setup one or more filter profiles, one for each group of devices that will share the same filtering settings. For instance, you may want to setup a profile for each classroom, team or sub-group within a classroom.
- Using any browser, login to your account.
- Select Filter Profiles from the menu.

- Click on 'Add Profile' to setup new profiles, say one per classroom or cohort of students.
- For the filter profile you wish to edit, click the edit icon next to the restriction option.

- Select the restriction option and save your selection by clicking on the tick button.
 Chrome Manager Setup:
1. Login into your Google Apps admin account, and select Device Management > Chrome Management > User Settings. Before you proceed, select the domain or organization you wish to configure Mobicip for.

2. Under 'Force-installed Apps and Extensions', select 'Manage force-installed apps'.

3. Search for and add 'Mobicip'. Save to return to 'User Settings'.

4. Back in 'User Settings', search for 'Proxy Settings'. Make sure it is set to 'Allow user to configure'.

5. Search for 'Incognito Mode' and disallow it.

Save all the changes made in 'User Settings' so far.
6. Go back to Device Management > Chrome and select Device Settings. Search for 'Guest Mode' and make sure it is not allowed.

7. Download the Mobicip certificate (MobicipRootCA.cer) by following this link.
8. Go back to Device Management and select Network > Certificates.

9. Upload the certificate (MobicipRootCA.cer) and select the option 'Use this certificate as an HTTPS certificate authority.'

Chromebook Device Setup
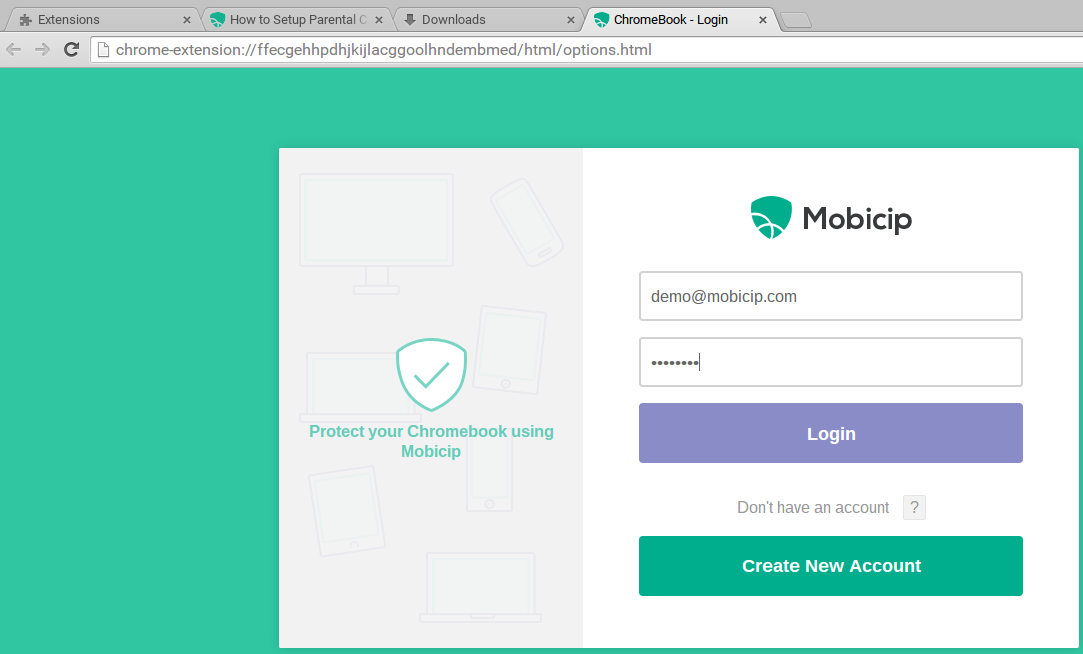
Login on a Chromebook as a user enrolled in the organization. Launch Chrome and login using your Mobicip account ( NOTE: this step can be automated when you deploy in bulk. Please contact support for assistance.)
That's it! Your Chromebooks are filtered now. Login at mobicip.com from any browser or computer to manage your settings and monitor usage.